![]()
Data Quality & Profiling
Improve data quality and increase trust in your data with data profiling, lineage & more.![]()
Dataedo AI
Create auto object descriptions and get help from AI chat in finding tables & writing queries. Business Glossary Build and share a universal glossary of business terms, policies and rules.![]()
Data Classification
Find and tag sensitive data in your databases to comply with data protection regulation.![]()
Data Community
![]()
Domains
![]()
Reference Data Management
![]()
StewardHub
![]()
Schema Change Tracking
![]()
Workflows

SQL Server
Power Bi
Tableau

Qlik Sense soon

Databricks
Microsoft Fabric
Azure
AWS

Oracle
![]()
Metadata Scanning
![]()
Product Tour
![]()
Why Dataedo
Book a demo Try DataedoArticle for: ![]() Oracle SQL Developer ▾
Oracle SQL Developer ▾ ![]() SQL Server Management Studio (SSMS)
SQL Server Management Studio (SSMS) ![]() MySQL Workbench
MySQL Workbench ![]() DataGrip
DataGrip ![]() Toad for Oracle
Toad for Oracle ![]() Toad for SQL Server
Toad for SQL Server ![]() IBM Data Studio
IBM Data Studio
In this tutorial I want to show you how to create Database Relational Diagram (or ERD) for your existing Oracle database with Oracle SQL Developer Data Modeler, a free data modeling tool from Oracle shipped with Oracle SQL Developer - a database console.
To create a diagram you will need to create a design in Data Modeler. The easiest way to create the new design is simply open Data Modeler. There will be a default new design named Untitled 1.
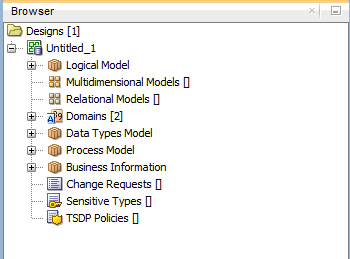
Before you start creating a diagram save design on your computer with Open File -> Save As… and provide filename and location where you want to keep your design.
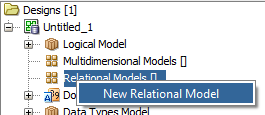
Now you need to create a Relational Model to hold a diagram. Right click Relational Models elements of your design and choose New Relational Model.
Now when you have new empty model in your design you can import tables and views into it.
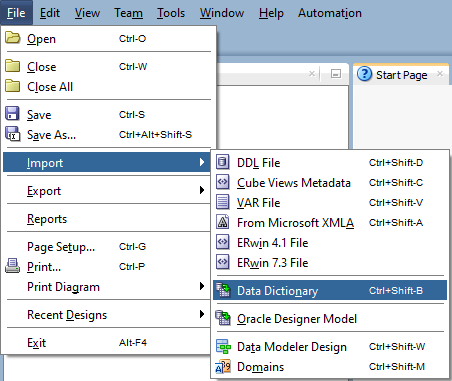
Now you need to import database schema (tables, columns etc.) from your existing database to your new relational model. To import schema select File -> Import -> Data Dictionary (or press Ctrl + Shift + B).
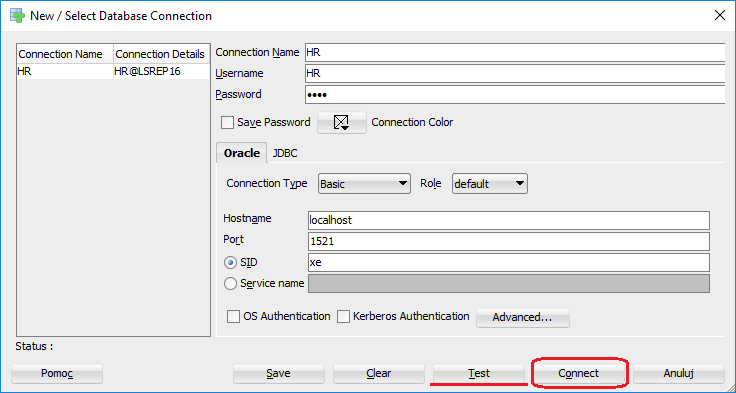
Provide connection details to your database. You can use saved connections: 
or provide all the details with Add button:
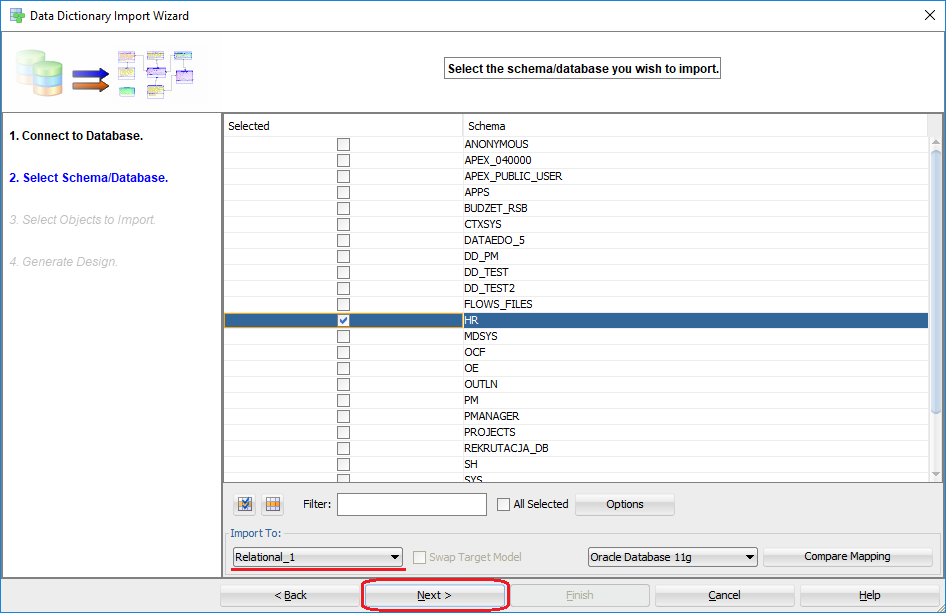
When you successfully connect to your database you need to choose schemas you want to include in your diagrams. Select schemas and confirm with Next.
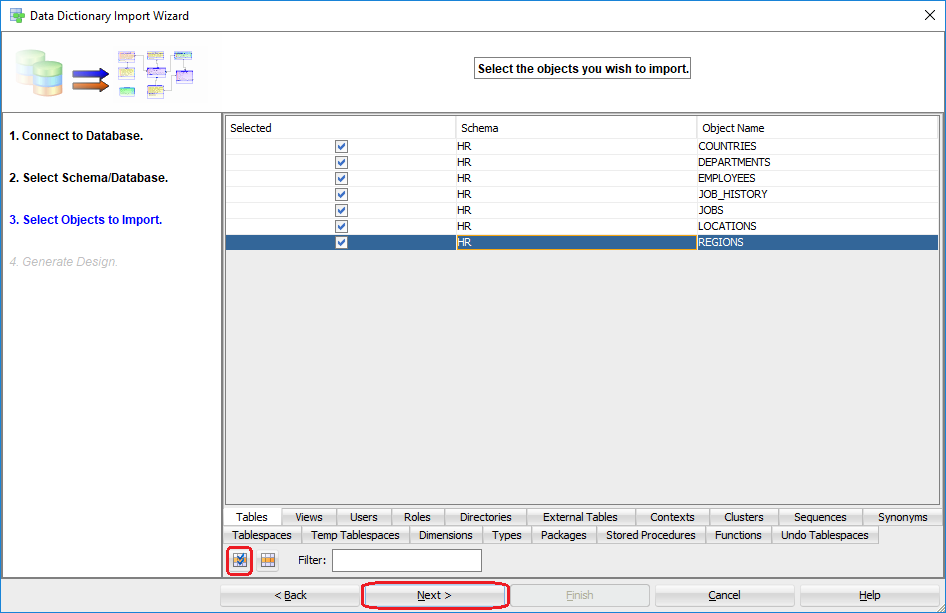
Now you can choose objects you want to import to the model. You probably want to import all tables and views. Select Table tab and choose tables or select all of them with icon showed below.
If you will have more Relational Models in your design you can choose where you want to import your objects. When ready continue with Next.
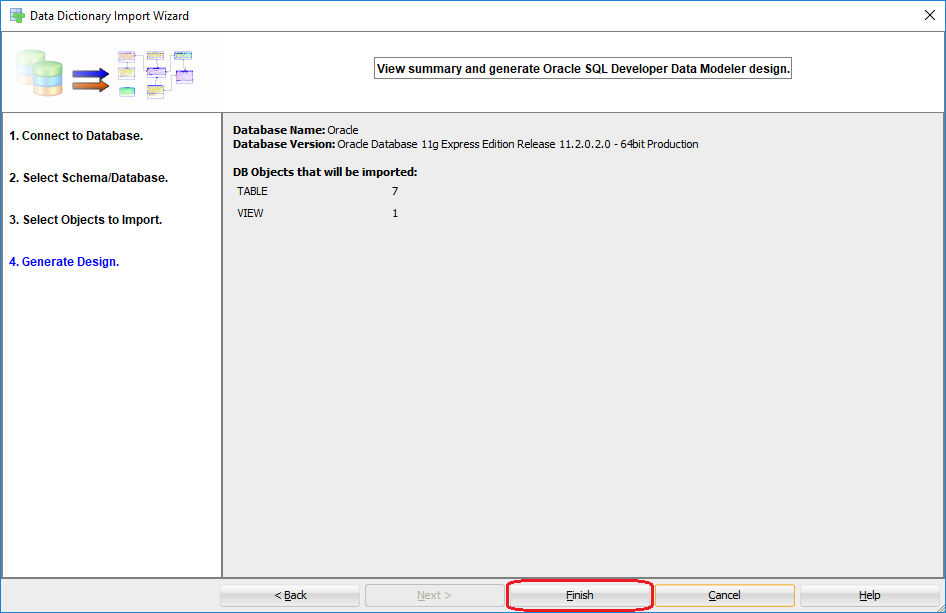
Now you see a summary screen before actual import. To start import click Finish button.
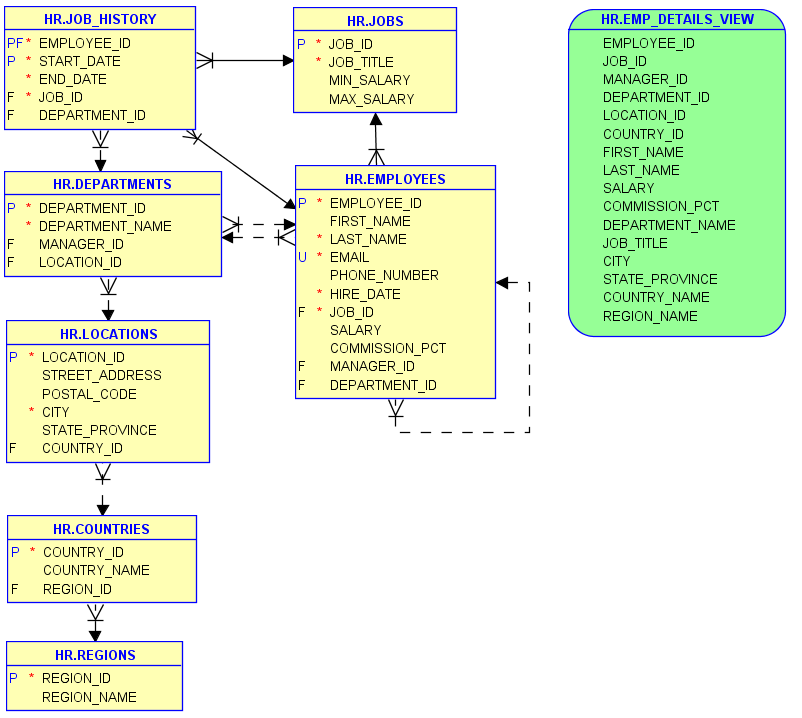
When import is finished you see a new model called Relational_1 with automatically generated diagram.
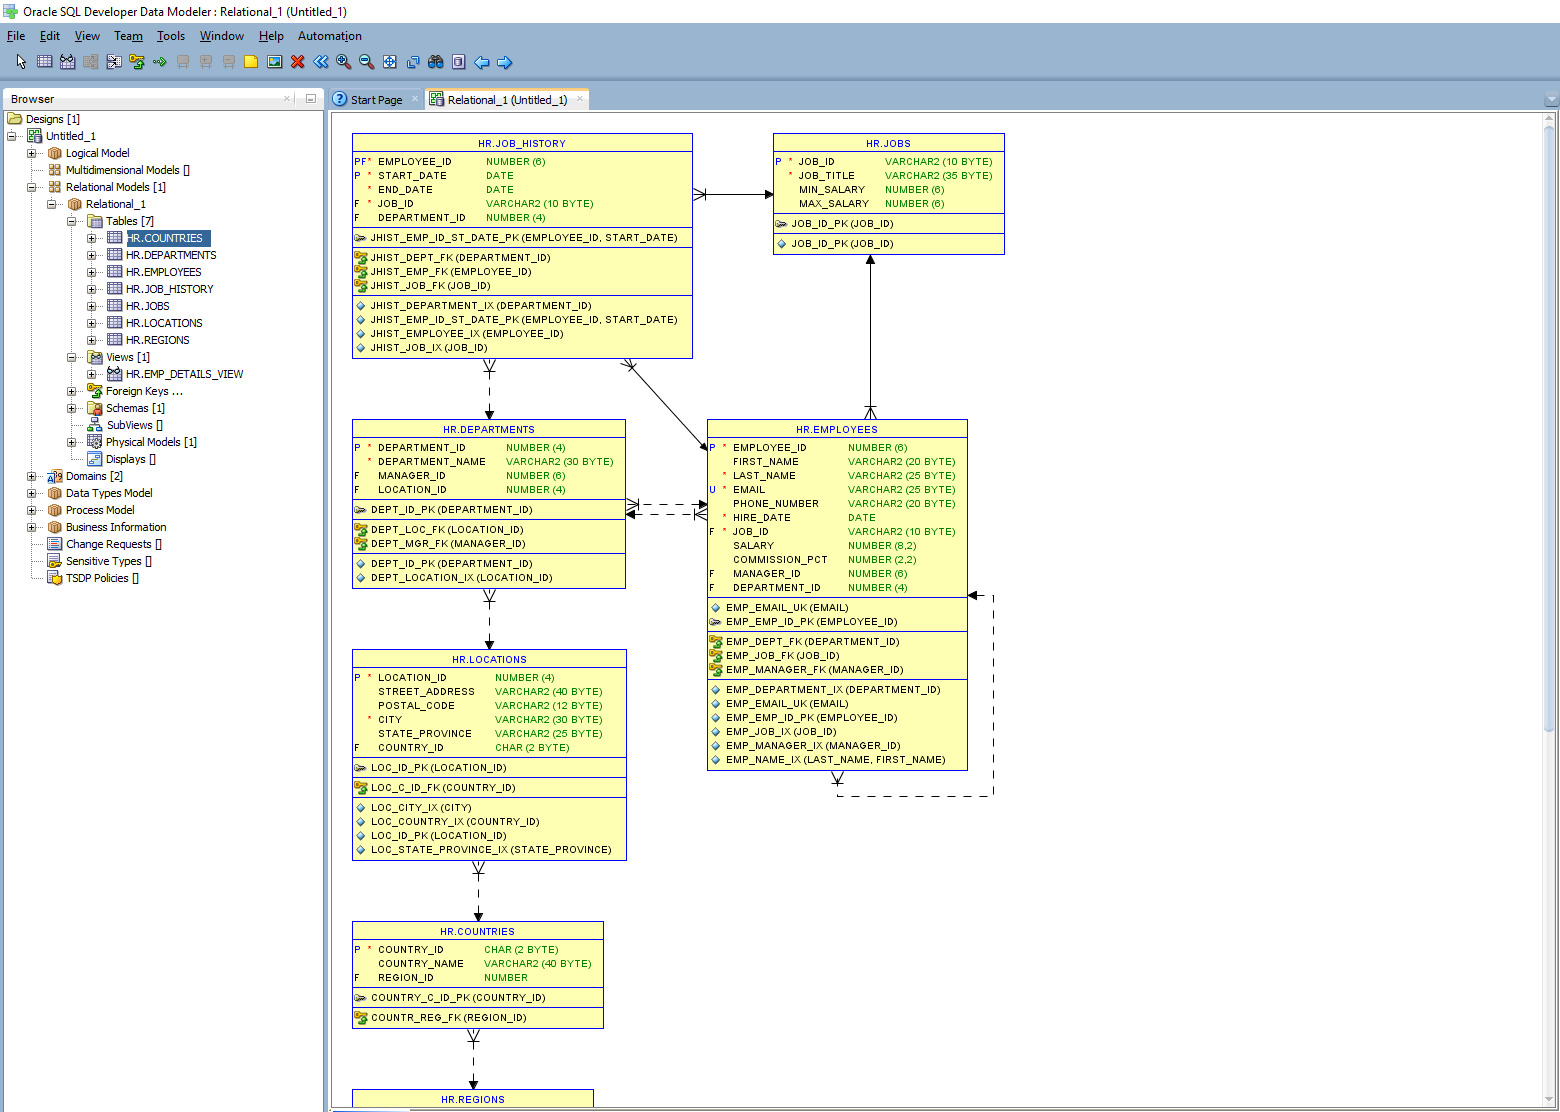
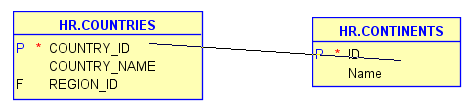
As you probably noticed, diagram includes relationships between tables imported from database foreign key constraints. Not all FKs are defined in most databases. To fix diagram you can add relationship in you model (this will not impact your database).
To add relationship select New Foreign Key from top menu.

Then click on referencing table (in my case countries table) and drag line and click on referenced table (in my case continents table).
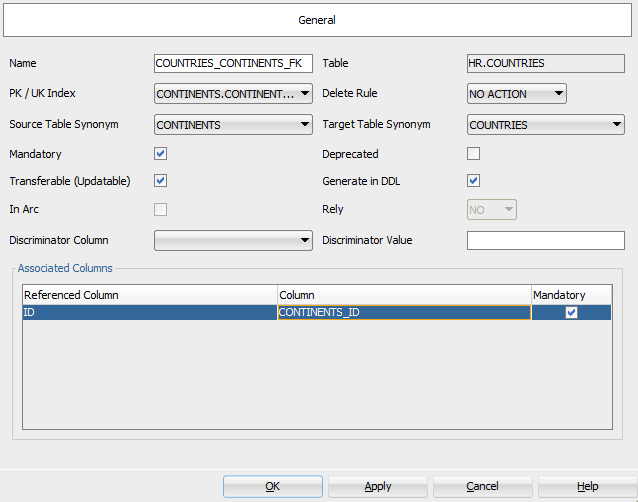
Now you need to provide FK and PK columns in Associated Columns section.
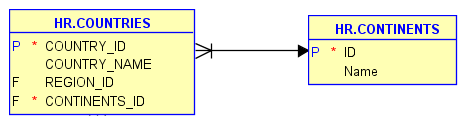
New relationship is shown on a diagram.
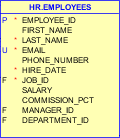
By the default, diagram includes all table details - columns, indexes and keys). If you'd like to hide some of this elements, right click on table or view and click on Show / Hide Elements.
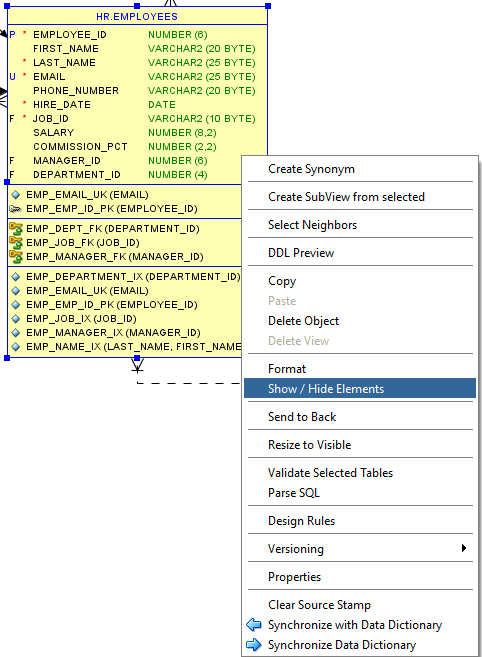
Now you can select what you want to hide.

For example on my diagram I don’t want to show indexes.
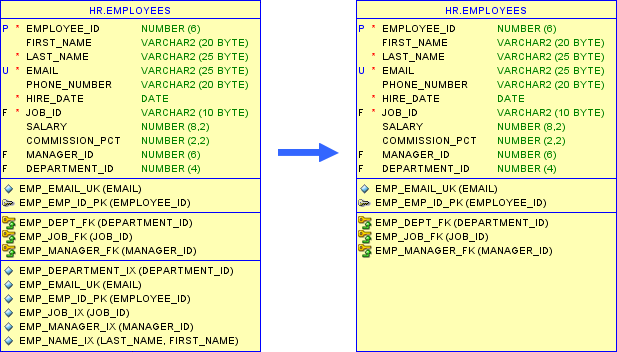
If you will hide elements in the object you will see unnecessary empty space in entity box. You can resize box manually or by choosing Resize to Visible from menu under right click.
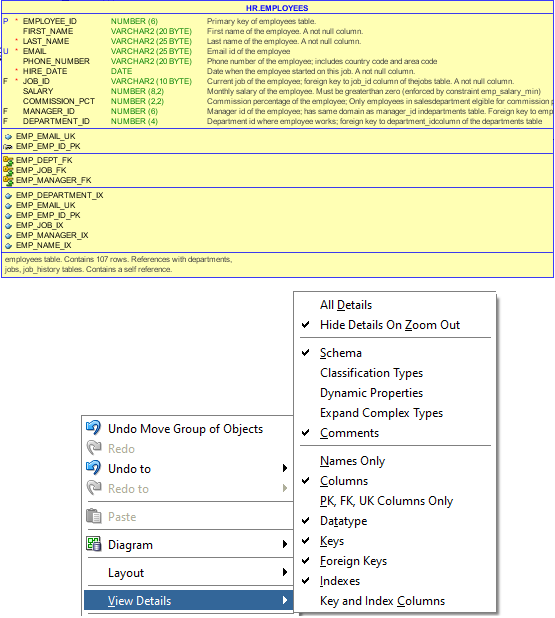
You can also define details shown on diagram globally. Right click blank diagram space, chose View Details and then choose one of the options in submenu.
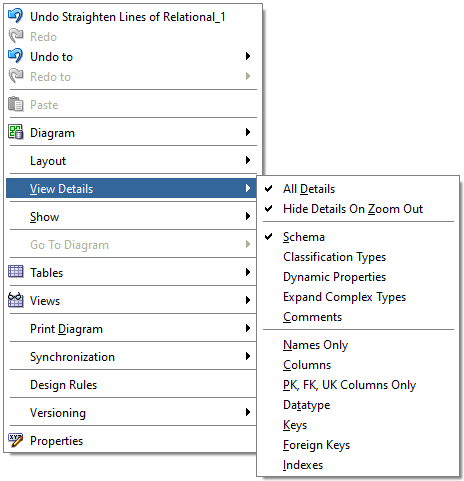
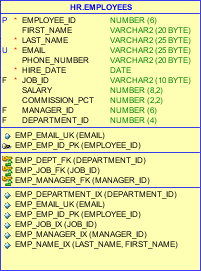
All Details
This option shows all elements of an object, so you can see columns, Keys, Datatype, Indexes.
Names Only
This option will show table names only.

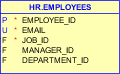
PK, FK, UK Columns Only
This will show only columns which are PK, FK or UK.
Columns
This option shows columns name and PK, FK or UK flags.
Additional options
You can choose which extra elements you want to show on diagram. In example below I have chosen Comments, Datatypes, Keys and Indexes.
I cleansed my diagram and ended up with this:
There is no easy way to simply hide element from your diagram. You can only delete objects from your design but this means that you will not see it in documentation or you will not be able to add describe it.
Also another why to achieve hiding object is to create subview but it is something for another tutorial.
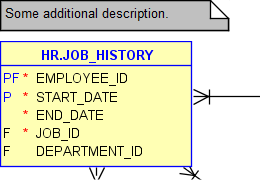
Sometimes you would like to add some information about object, relation or anything else on diagram. You can do that using notes. To add a note click New note from the top menu and click on diagram in a location where you want to place it.

To change text of a note just double click on note or right click and select Properties.
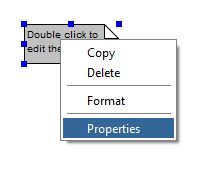
Window to change text of a note is a simple text-area field. I have added some note without nothing special in it.
Finally, when your diagram is ready, you might want to share with others. You can export diagram to a number of formats:
To export diagram go to File -> Print Diagram in menu or right click diagram blank space and then choose Print Diagram and choose export format.